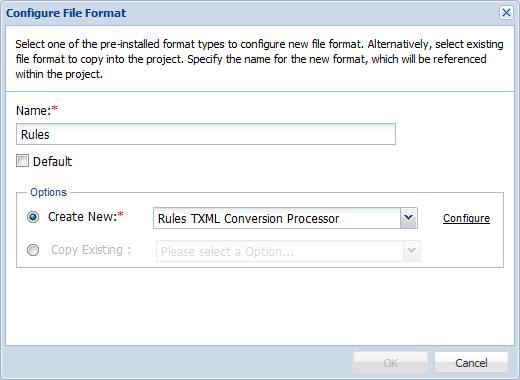
Configuring XPath File Format

To configure XPath file format:

  1. Follow steps 1-3 in the Adding and Editing File Formats section above.
  2. Click .

    The Configure File Format dialog box appears.

  3. Enter a unique name for the XPath file format.
  4. Select the Default checkbox to mark the file format as the default selection. This will enable quick selection of file formats while adding submissions.
  5. Select Create New and choose Rules TXLF Conversion Processor from the drop-down list.

    The Configure option will be activated.

  6. Click Configure.

    The Configure File Format - Rules File dialog box appears.

  7. Enter the file extensions that will be part of this new Rules file format. You can enter several file extensions by using comma (,) as delimiter.
  8. Select the target and source encoding from the drop down list.
  9. Click to browse and select the Rules file.
  10. Select the Check for new XML elements checkbox to enable PD to generate an error and stop the submission when XML source file contains elements other than those defined in the rules file.
      Note:

    When a submission is stopped when new XML elements are found, the rules files should be edited by the Administrator and uploaded to the project. The Project Manager can then use the Retry option under Error Handling to move the submission forward. Refer to Error Handling in Online Help and User Guide for Submitters or Project Managers.

  11. Select Allow Blank Segments checkbox to accept blank segments in submissions.
  12. Click OK.

    The new Rules file format appears in the Project - File Formats tab. This file format can be further edited by clicking on .