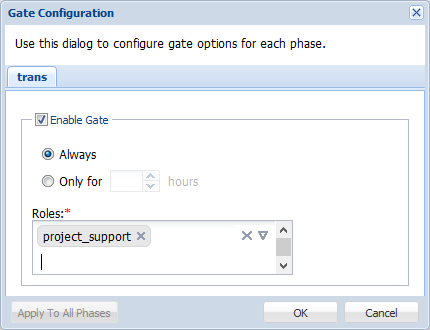
The Gate option allows the submitter or project manager user to promote, demote, reset or progress the submission to the next phase of a workflow. This option will allow client PMs to intervene between steps in the workflow and make decisions based on different conditions. The four actions that can be executed when a gate is enabled for a project are as follows:
Demotion: This action will regress the selected batch or language back to previous workflow step. This is not a cancellation: just a step regression with notification going to the user who performed the previous step. Content uploaded previously for that step will still be attached and accessible after the demotion
Next: This action will progress the submission to the next phase in the workflow.
Skip: This action will skip the next phase and push it directly to the one after.
Reset: This action will undo all gate operation changes made during a session (i.e., since the dialog box was opened).
| Note: Configuring a gate for a workflow within a project will only apply for that workflow in that project and not for that same workflow used in other projects. Gate can also be configured by organization users if the Project Process policy is selected for that role. |
To configure a gate:
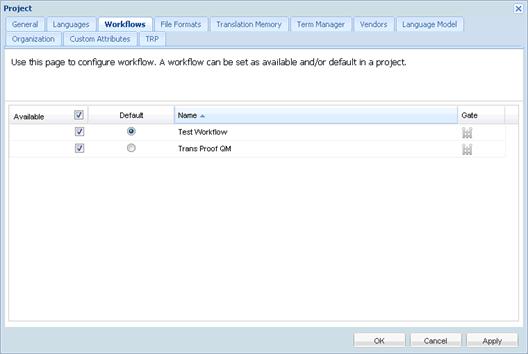
 next to the workflow.