The Custom Attributes option can be used to configure new Text or Combo fields in the Manual Submission dialog box used by Project Managers or Submitters to submit content for translation.
To add custom attributes:
Open the Project Director Administration dashboard and click Projects folder.
The Projects page appears.
Select a project from the Project list and click Edit Project.
The Project Details screen appears with the information for the selected Project.
Click the Custom Attributes tab to add Custom Attributes for this Project.
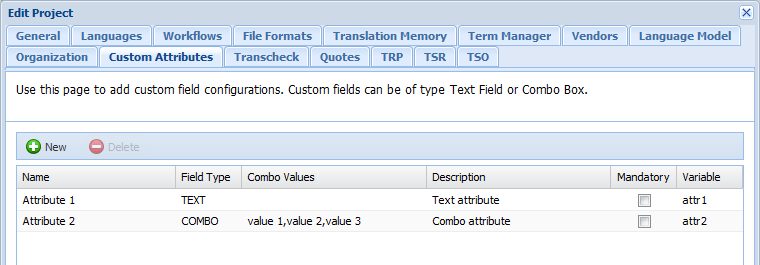
The Custom Attributes tab details appear.
Click .
Click and enter the name of the field under the Name column.
Click and select the field type under the Field Type option.
Click and enter the Combo Values if Combo Field Type is selected.
Use commas to separate the values (and no spaces). If Text field type is selected the user will need to enter a text string.
Click and enter the Description.
The Description will be displayed as a tooltip when adding a custom attribute to a submission.
Check the Mandatory checkbox if the custom field entry is mandatory.
Enter a variable in the Variable column to use Custom Attributes in notifications.
Variables must be unique, but if several projects share the same Custom Attribute field, the variable can be reused.
Click Apply if you want to continue editing details in other tabs or click OK.
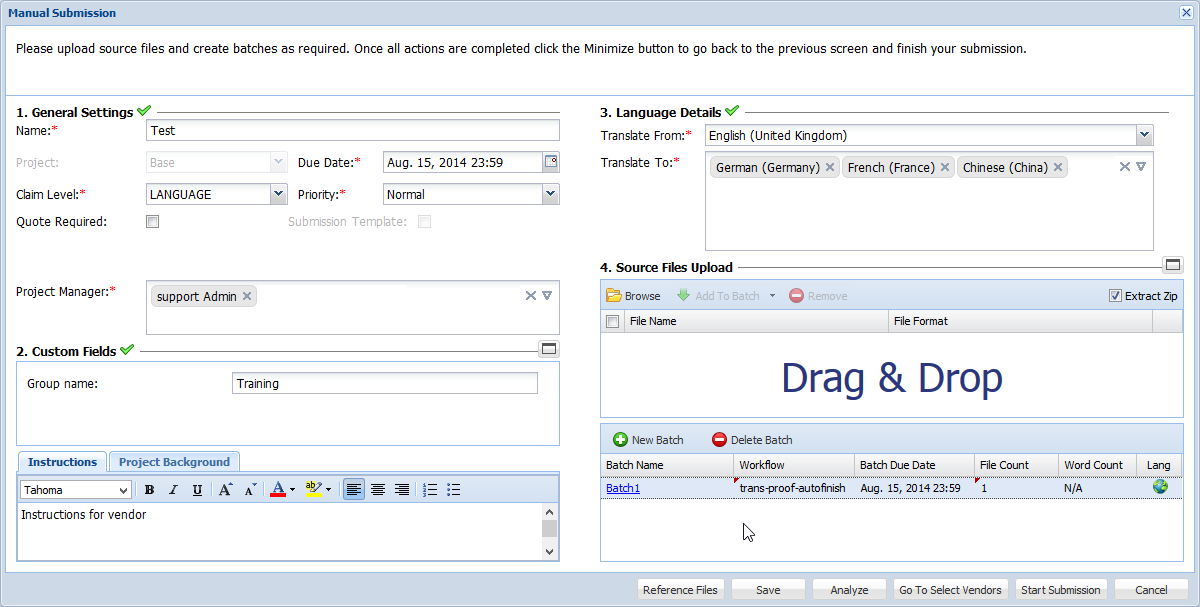
The Custom Attributes will appear in the Manual Submission dialog box. An example screenshot is given below.
Note:
Custom Attributes can be added to email and bubbles notification templates using Velocity notation. For example, attr1 from the image in step 3 is added as $attr1 to the templates.
 .
.