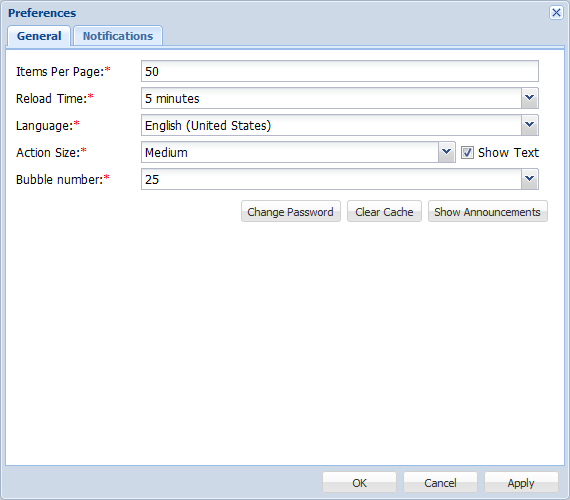
- Open the Project Director dashboard (Active folder) and click Account > Preferences on the top right hand corner.
- Enter the General Preferences as follows:
Option
Description
Enter the number of submissions that should be displayed per page on the dashboard.
Select the time interval at which the dashboard should reload.
Select your preferred language. The dashboard language will change based on your choice.
Select the preferred action icon size from the drop-down list.
Check or uncheck checkbox to view or not view the action text under the action icons.
Select the number of Notifications to be displayed in the Notifications bubble on the dashboard.
Click to change password.
Click to clear Project Director internal cache. To clear browser cache you must manually clear the cache via the browsers own options. Alternatively you can press Shift+F5 to force a reload.
Click to see notifications from the system administrator about any Project Director projects that you are associated with.
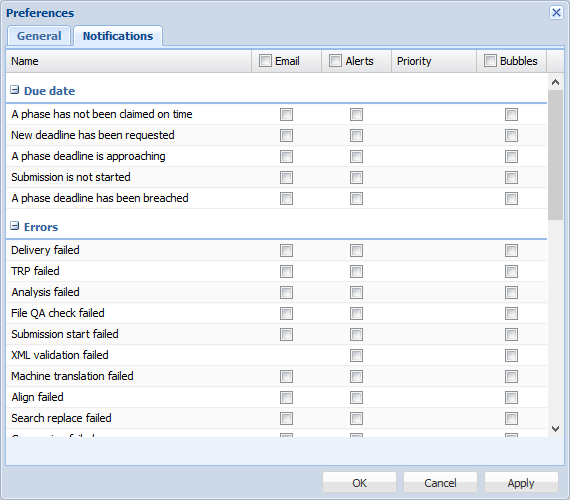
To select the Notifications, click on the Notifications tab.The Notifications appear.
- To select the Notifications, click the Notifications tab.
- Select the checkbox under Email column to receive email notifications. The recommended notifications are:
- Select Receive notifications only for my submissions checkbox, to receive email notifications only for submissions where you are the owner/project manager.
- Select the checkbox under Alerts column to receive alerts on the dashboard. Click in the Priority field to choose a Low, Normal or High priority for the alert. An example screenshot is given below.
- Select the checkbox under Bubbles column to receive alerts in the bubble on the top right hand corner of the dashboard.
- Click Apply if you want to continue editing details in other tabs or click OK.