When a submission is being created, you can choose the vendors who are eligible to claim or quote on a submission.
To assign a vendor to a new submission:
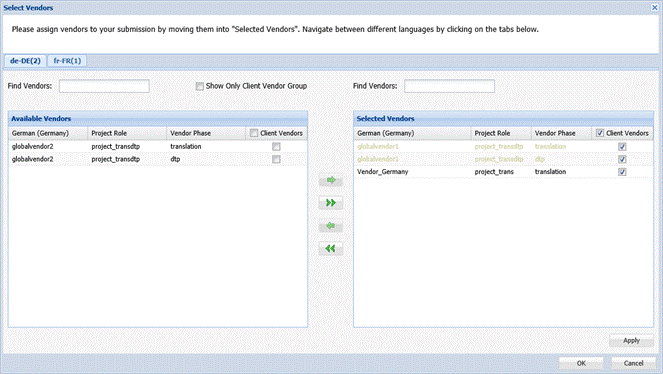
- Click Select Vendors under the manage tab as shown in the screenshot below.
- Click Start Submission to start the submission.
A new submission is created in the Active folder.

Note: If the project includes the quote step, the chosen vendors can now view the file(s), instructions and reference material, and proceed to create a quote for the submission. The vendor can claim the submission only after the submitter approves the quote. If the project does not include the quote step, vendors can proceed to claim the submission for translation. Selecting a vendor does not assign the job to that vendor; it only makes them eligible to claim the job from their Available folder.