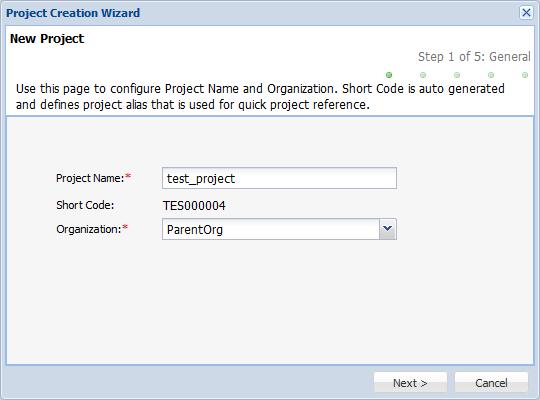
- Click
 .
. - Click Next.
- Click
 and select the source and target languages for this project.
 - Click Next.
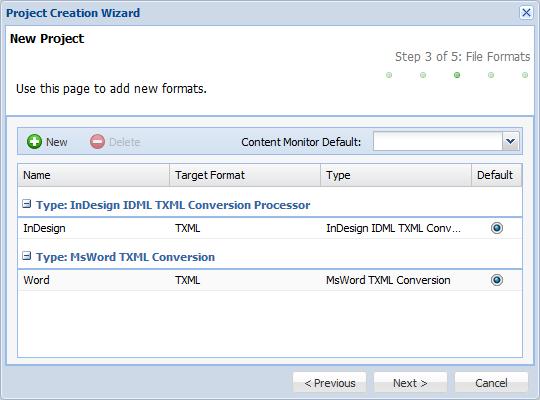
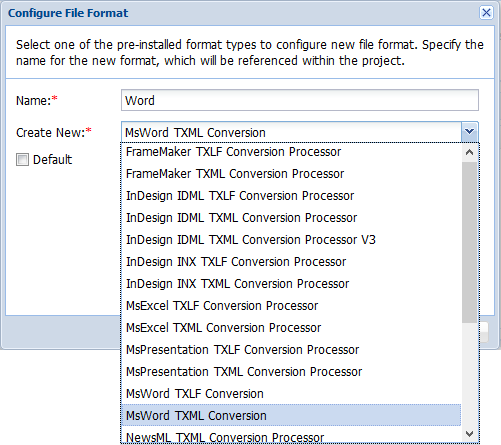
- Click .
Enter the file format name and select a pre-configured format type.
Note: You can enable multiple file formats for a project. TXLF based processors must be used if the project is to take advantage of TransStudio Online or TransStudio version 4. For text based formats such as XML or Java Properties files, choose Rules TXML or Rules TXLF based processors, and provide the appropriate rules files and text encoding settings.
- Click Next.
- Click Next.
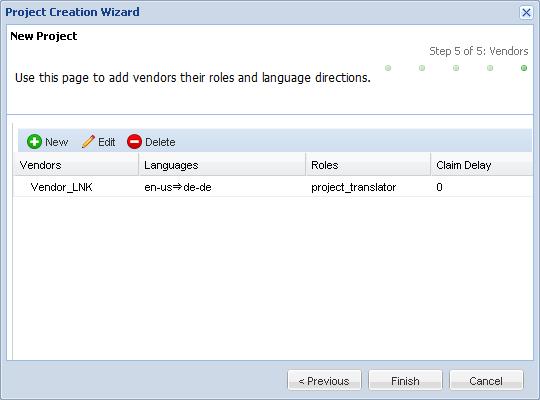
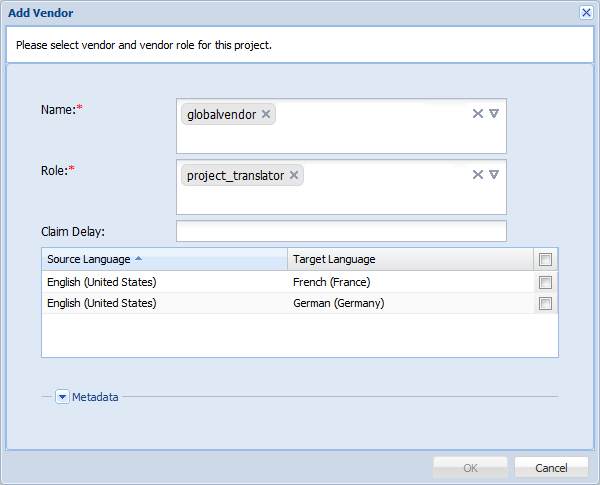
- Click .
- Enter the Claim Delay for claiming a job. The value is calculated in minutes.
- Select the source and target language pair the selected vendor will have enabled for this Project.
- Click
 to customize quote reports for each vendor.
 - Click .
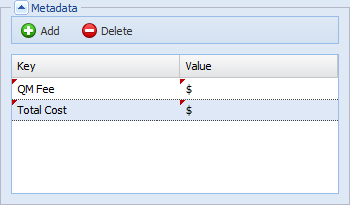
Enter the Key and Value of the custom text that should appear in the quote report for this vendor.Note: This step also requires editing of the quoteReports.jrxml.
- Click Finish.
The new project appears in the Project page.
Note: After initially creating a project, it’s necessary to edit it to select Cost Scope, Organization and Translation & Review Portal users. Refer to Editing Projects for more information.