Adding Submission Templates

To save a submission template:

  1. Open the Project Director dashboard and click Add Submission under the submit tab.

    The Manual Submission dialog box appears.

  2. Enter the following General Settings:

    Option

    Description

    Name

    Enter a unique name for the submission.

    Project

    Select the project.

    Note: The selected project determines the workflows available to the submitter, the source and target language list, file formats and Vendor information.

    Due Date

    Click the calendar icon and select the submission due date.

    Claim Level

    Select a Claim Level from the drop-down list. The options available are:

    • Language: select if the Vendor can claim one or more languages from a submission for translation. Language level claim is available when quote is configured at Project level. This is the default selection.

    • Batch: select if the Vendor must claim a complete batch for translation at all times

    • File: select if the Vendor can claim a file for translation. This option is not available for Quote workflows.

    Priority

    Select the priority of the submission.

    Quote Required

    Check if you want to review a detailed quote from the Vendor(s). Note: This checkbox will be available if the feature is enabled in the selected Project.

    Submission Template

    Check if you want to create a submission template. Note: This checkbox will be available if the feature is enabled at the System and Project level security roles.

    Project Manager

    Select the submission Project Manager(s).

    Note: The submitter will already be added as the PM, but others can be added. A user who is added as a PM has full control of the job within Project Director and will receive all notifications.

    Project Background

    Enter a Project Background.

    Note:   

    The Project Background can be viewed by client Submitters chosen as PMs and Vendors.

    Special Instructions

    Enter instructions for the Vendor. You can also upload reference material.

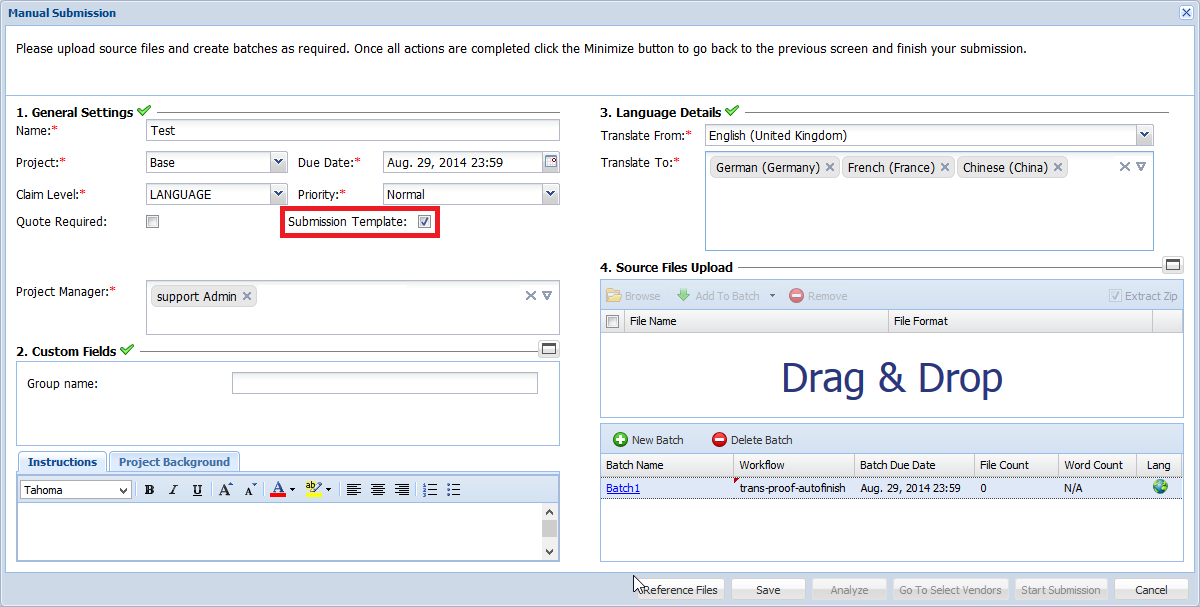
  3. Enter the following Language Details:

    Option

    Description

    Translate From

    Select the source language from the drop down list.

    Translate To

    Enter the target language(s). If the selected source and target language pair has a translation memory (TM) defined, the target language is highlighted in green. If there is no TM, it is gray.

    Note: The languages set as default for a project will appear automatically. When you type the first letter of a language, the language will appear as an option. To view all the available languages, place the cursor in the Translate To: text box and press the Down arrow on your keyboard. If you wish to remove a language from the list, click on x next to the language. If the desired language is not available, contact support@translations.com.

  4. Click to create a new batch.

    A new batch is created in the panel below.

      Note:

    Templates cannot be created if Source files are already uploaded.

  5. If a Workflow is not selected by default, double-click below the Workflow column to select a workflow from the drop-down list.
  6. Upload reference files. Refer to Uploading Reference Files.

    A completed Manual Submission dialog box for creating a submission template is given below.

  7. Click Save, to save the submission template.

    A new submission template is created in the Templates folder.

      Note:

    If the Submission Template checkbox is enabled then the Analyze and Start Submission buttons will not be available and Source files cannot be uploaded.