Creating Quotes

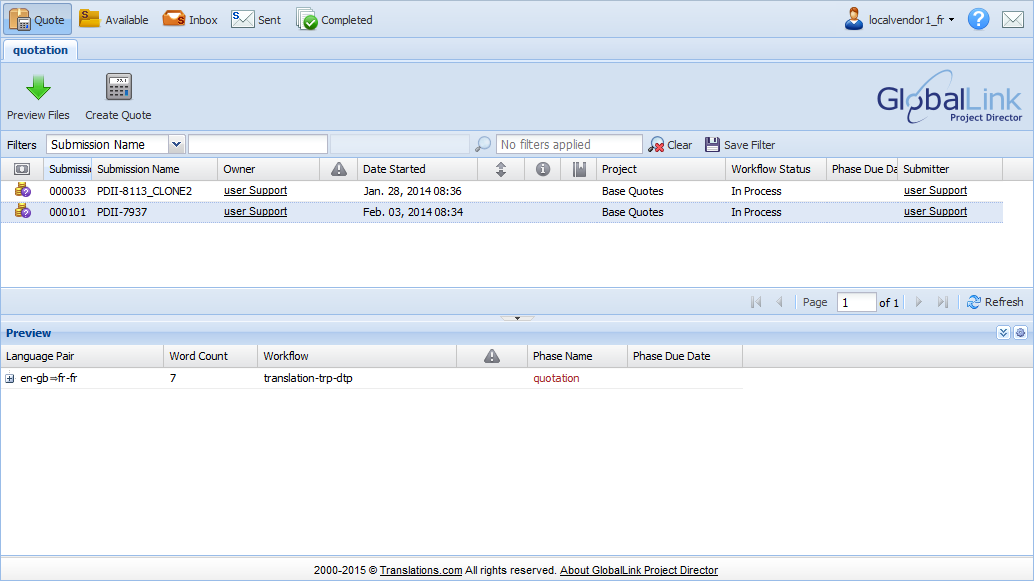
When the client submits submissions for translation using a quote workflow, they appear in the vendor's dashboard as new submissions. Selected vendors can view these submissions for their assigned language in the Quote folder and provide a quote. You can preview files within a submission before creating a quote. Refer to Previewing Files.

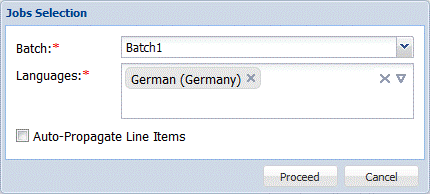
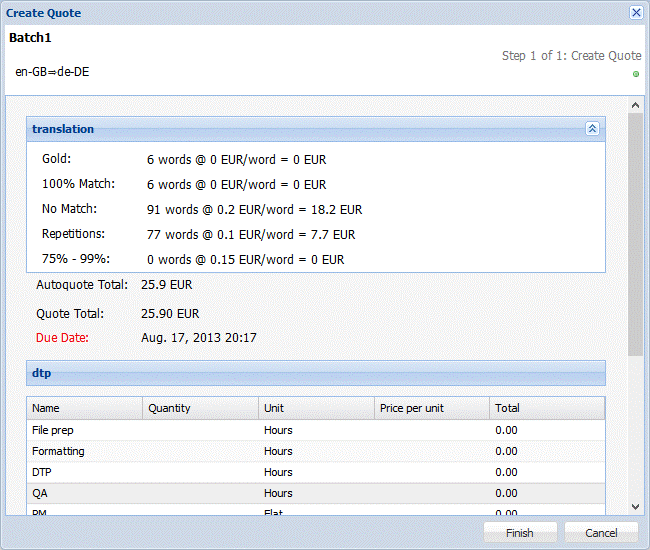
To create a quote for a submission:

  1. On the dashboard, view new submissions in the Quote folder as shown in the screenshot below.

  2. Choose a submission and click Create Quote under the quotation tab as shown in the screenshot below.

    The Jobs Selection dialog box appears.

      Note:

    You can preview the files being quoted on before creating the quote by clicking on Preview Files under the quotation tab.

  3. Select the batch from the drop down list and enter the target language(s).
  4. Select the Auto-Propagate Line Items checkbox to automatically populate the additional cost for all languages when you add cost for more than one language.
  5. Click Proceed.

    The Create Quote dialog box appears for the first language.

    The cost per word is populated according to the cost scope supplied by the vendor and entered in the system by the System Administrator.

  6. Enter the cost for the additional line items. For example, for the DTP cost, you will need to enter the quantity and the price per hour. The available line items are decided by the client when the project is setup. If there is a line item you want added, please contact the GlobalLink® technical support team at support@translations.com.

    The Quote Total is automatically calculated.

  7. Click Next to enter the quote for the remaining languages, if required.
      Note:

    If you selected the Auto-Propagate Line Items checkbox, then the additional cost added for the first language will be populated for the remaining languages.

  8. Click Finish.

    The quote can now be viewed by the client. If they approve your quote, you will be able to start the translation process.