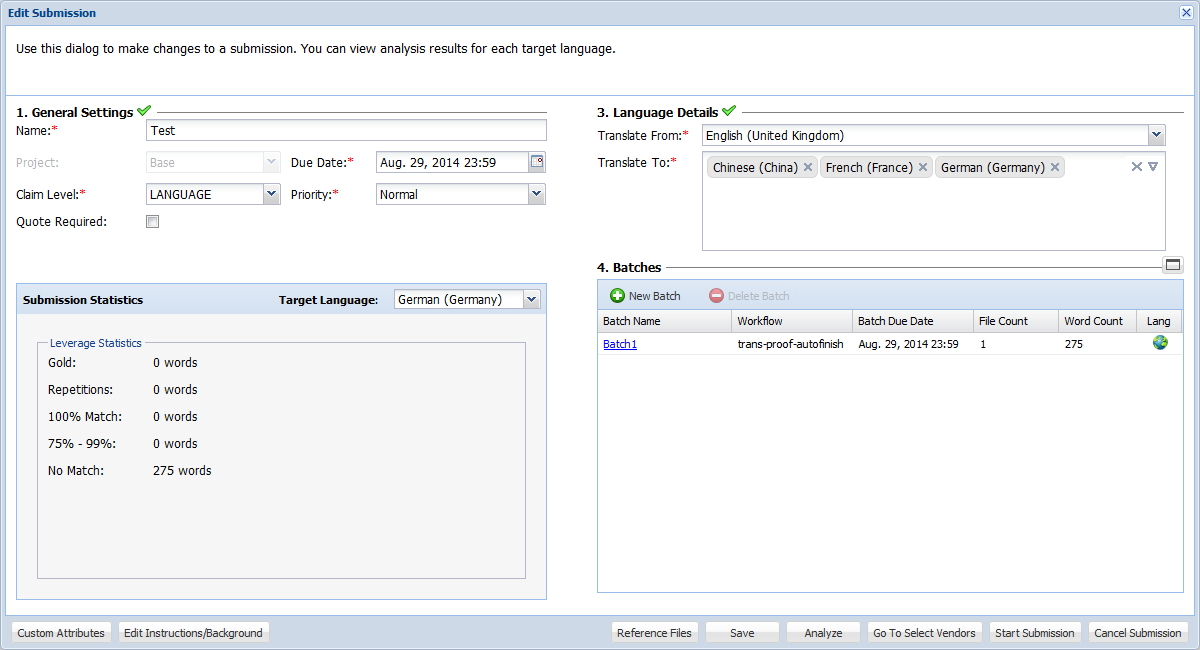
- Click Edit Submission.
- Edit Batches, if required.
- To edit the batch further, click on the batch name.
- Add or remove files, if required.
Option
Description
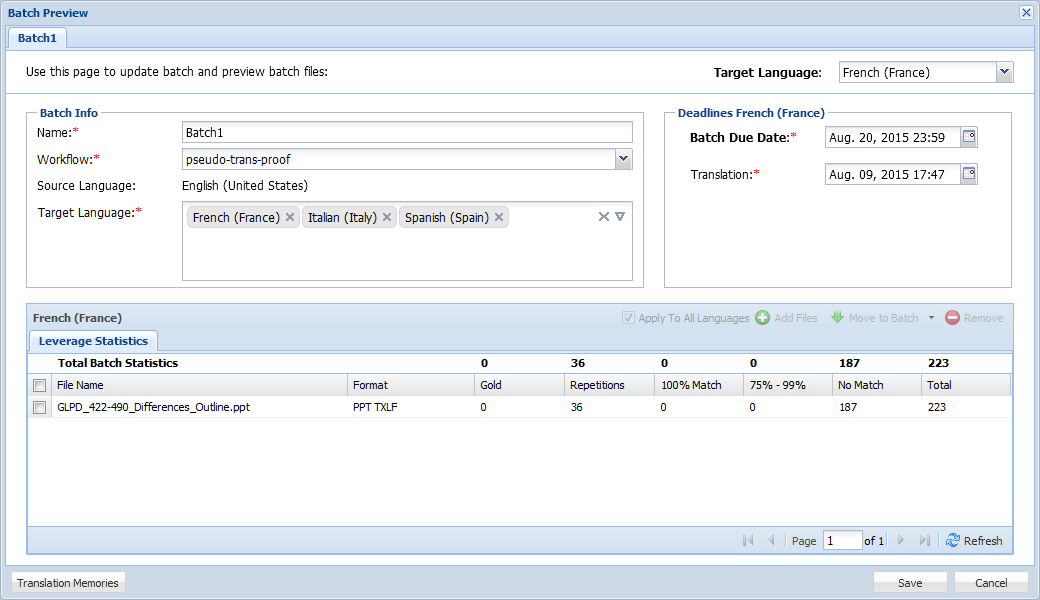
Add Files
Click to add source files for translation. Refer to Adding or Removing Submission Files for more information.
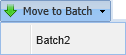
Move To Batch
This button will be enabled only if the submission has more than one batch. To move files to a different batch, select any of the files and move to another batch from the drop-down list as shown in the screenshot below.
Remove
Click to remove source files from the submission. Refer to Adding or Removing Submission Files for more information.
Translation Memories
Click to view the list of translation memories being leveraged.
Note: The Translation Memories button will be enabled only if source files are added.